If you're anything like me I'm sure you've been hatching eggs in your incubator for weeks now. I have a tendency to hatch back to back, but even so every once in awhile I need to take a break and clean the incubator.
A dirty egg incubator is a breeding ground for bacteria which can cause your hatches to fail. None of us want that to happen! So technically the best thing to do is to clean your incubator after every hatch. I know it's hard to put off chicks, but for the sake of your next set of eggs you have to do it. We'll try to get this cleaning thing done as quickly as possible!
A dirty egg incubator is a breeding ground for bacteria which can cause your hatches to fail. None of us want that to happen! So technically the best thing to do is to clean your incubator after every hatch. I know it's hard to put off chicks, but for the sake of your next set of eggs you have to do it. We'll try to get this cleaning thing done as quickly as possible!
Today I want to talk about cleaning plastic incubators. I've already discussed How To Clean Your Styrofoam Incubator and they are quite different. Styrofoam is a lot more porous and has more crevices for bacteria to hide in, so you need to use stronger cleaning products then with this nice smooth plastic that simply wipes clean.
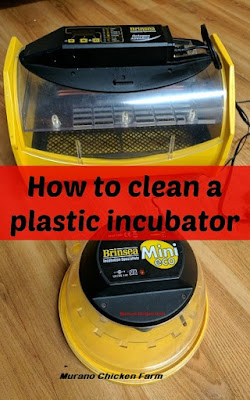
I'm going to show you my incubator cleaning procedure for two different Brinsea incubators, the Mini Eco and the Octagon. This same method can be used for any similar incubator. These just happen to be the ones I have. It's really quite simple, it doesn't take very long and you only need a few supplies so let's get started.
How to clean a plastic incubator
To clean a plastic incubator you're going to need:- Small screwdrivers
- Small soft clean paintbrush
- Soft toothbrush
- Soap solution
- Paper towels
- Sink & water
As far as a soap solution goes, Brinsea has their own brand of cleaner that they suggest you use and I do use it most of the time. If your incubator has it's own brand of cleaning product designed to be used with the incubator, you should consider using that. If for some reason I don't have that on hand I use a mild dish soap like Dawn. Whatever you use, make sure you rinse or wipe it away very well so there's no chemical left behind.
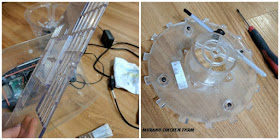
You're going to start by taking the incubator apart. Take pictures as you go if you think you won't remember how the parts fit back together. Remove the top from the base and turn the top upside down so you're looking at the inside of the incubator. These particular models have 4-6 screws to loosen to remove the inside plastic guard plates. These plastic guards protect the heating element and fan from the chicks once they hatch. It also tends to accumulate a lot of chick dust!
Once the pieces are apart you'll get your dry paintbrush and use it to gently dust out all the dander and feather particles through the whole incubator. Be very careful when working near the fans and heating elements.
After the dust is gone, wet a paper towel with clean water and wipe the inside of the plastic window. Use a damp towel, not sopping wet. You don't want to drip water on the heating elements. It just needs to be wet enough to wipe off the inside of the windows.
Next we'll work on the plastic guards that we took out earlier. As you can see, on one of them there is absolutely nothing attached to the plastic guard. That one can go to the sink. The other one has a thermometer attached to it and I choose to wipe that one down with a damp paper towel instead. You'll want to brush over it with your paintbrush first to remove the dust, then wipe clean. Set that aside to dry.
Depending on which incubator you have not all of the bases are washable. The Mini Eco is just a plain piece of plastic but the Octagon has a thicker base. You can wash the Mini Eco base in the sink, along with that plastic guard plate from the Octagon that we took out earlier. You can also wash the hatching basket that goes inside it, along with the egg dividers. I wash these just like I'm washing regular dishes, wiping gently with a soapy washcloth.
You'll need the toothbrush to get into some of the corners and crevices. The toothbrush is great for the basket the chicks hatch in. It really gets all the hatching goo and chick poo scrubbed away. Make sure you wash everything by hand, none of it should go in the dishwasher. Rinse everything very well and allow to dry.
The base of the Octagon can be wiped down with a wet rag and the inside will need scrubbed out. You'll probably need the toothbrush again for the channels inside the base. You can rinse the inside, but do not submerge the whole thing in water.
Allow the wet parts to dry then reassemble the incubators making sure the screws line up. Make sure the incubator is completely dry before using again.
Now that you're incubator is clean and ready for a new hatch...what kind of chicks are you going to hatch next?
~L
Want information on raising chickens sent right to your email weekly? Click right here to join my list and get new posts sent directly to you the day they're published ... plus, you'll also get the free download '25 Ways to save money raising chickens'.
This post contains affiliate links. If you chose to purchase something through the link, I will get a small payment from Amazon. It will not affect your purchase price. Click for full disclosure.


No comments:
Post a Comment