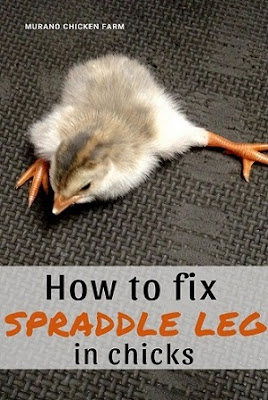
This is one of the most common problems in chick hatching. Spraddle leg chicks can happen for a few reasons. Sometimes the chick just hatched like that, often with one leg sticking out to the side.
Other times it occurs when the new chick cant get a good grip in the incubator and both legs splay out in opposite directions. Spraddle leg can even occur the first few days in the brooder if the bedding gets kicked away and the chicks feet slip on a slick brooder floor.
Either way....it's easy to fix spraddle leg in chicks if you get to it right away. This is super important! The longer the chick stays splay legged the harder it is to fix.
You'll need to hobble the legs together and 're-train' them to stay that way. The tools you need are simple: one band aid and a pair of scissors.
How to fix spraddle leg in chicks
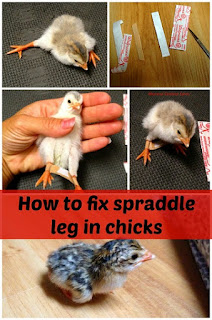
First, cut the band aid lengthwise. I do this while it's still in the package. Pull out the split band aid and peel the tab off one end.Wrap the band-aid around one leg, fastening it to itself. Do this again for the other leg. It will look like the picture below.
When both legs are banded, the chick (or in these pictures, keet) can now stand. The band-aid should have just enough give that the chick can get around for a day or two while it heals. If the band-aid is too stiff, you can rub the middle pad between your fingers a bit to soften it and make it easier for the chick to get around.
this hobble on for at least 24 hours. You can take the hobble off by gently cutting the band-aid with small scissors. The chick should be able to stand on its own. If it still cannot stand, put another band-aid hobble on and check again the next day.
It is SUPER important that you do this as soon as possible! If you wait, it will take longer to fix. Then you will have to leave the hobble on for a few days. If you wait too long, the leg will twist and just won't got back no matter what you do. I've had about a 95% success rate using this method.
Preventing spraddle leg
To prevent spraddle leg, use a piece of rubber shelf liner in the incubator in the chick hatching area. This will give their little feet something to grip on to when they stand. Do not use slick surfaces like newspaper in the brooder.
I usually put down shelf liner and put wood shavings on top of it to absorb the poop. This way if they kick the shavings out of the way, they still have the shelf liner to keep them from slipping. I've also used puppy pee pads in the brooder to prevent slipping. You can pick both of those up both of those and other chick supplies at the dollar store.
Update: Since I wrote this post, I have been asked about using a hair elastic and a piece of drinking straw to fashion a hobble. While it is quite clever, I've seen picture of chicks with bloody legs from the drinking straw ripping into the it's tiny legs as it tries to walk. For this reason I do not recommend using that method.
~L
Want information on raising chickens sent right to your email weekly? Click right here to join my list and get new posts sent directly to you the day they're published. You'll also get the free download 25 Ways to save money raising chickens.
I am not a veterinarian or other animal care professional nor do I claim to be. I am simply passing on information that has worked for me and my flock. This information is for entertainment purposes only and is not meant to treat or diagnose any medical condition. Please see a vet if your chicken is ill. Click for my full disclaimer.
This post contains affiliate links. If you chose to purchase something through the link, I will get a small payment from Amazon. It will not affect your purchase price. Click for full disclosure.


I have a hen that has a spraddled leg from and injury! Do you think this will work for her?
ReplyDeleteIt might. You could try vet wrap since band aids would be too small for a hen. Tractor Supply sells it for under $3. It's flexible, but sticks well to itself. Good luck!
Delete~L
Can i use this on my 4 week old baby budgie???
DeleteI have never tried it on a budgie before, but it should work the same way.
DeleteLisa
Thank you for the post. I have heard about doing this, but the photos make is easy and clear. I haven't had this problem yet, but I am still new to hatching.
ReplyDeleteI have done this for five or six chicks over time and it has always worked. By the time they are a few weeks old, you cannot tell them apart from the others.
ReplyDeleteThis comment has been removed by a blog administrator.
ReplyDeleteI just did this and it seems to be working, but how long do I keep it on.
ReplyDeleteA day or two is all it takes if they're just hatched. A little longer if they're over a week old. How's the chick doing?
DeleteLisa
I've used this splay leg trick for over 10 years. Only lost one chick in that time that I tried to fix. It works!
ReplyDeleteThanks for your comment! I always love to hear from people who use the same techniques that I do!
DeleteLisa
Oh my gosh I just saw this and approved it (was in spam, sorry!) but in case anyone else stops by with the same question, splay leg is not caused by a vitamin deficiency, so there is really nothing the chick needs nutritionally as long as they are getting chick starter.
ReplyDeleteLisa